
Brides on a budget often wonder how to make a professional wedding cake without extensive baking experience.
Turns out that making a wedding cake is pretty straightforward if you pick the right recipe and dedicate time to practice.
A DIY wedding cake requires precise calculations, budgeting, and significant planning, but in the end, all the efforts are worth it.
However, weigh your skills and time before deciding to make a cake yourself. The week before the big day tends to be nervous, and baking a wedding cake is a great responsibility.
Some help is always welcome with DIY wedding cakes. Ask your friends or family members to assist you in shopping, baking, decorating, and delivering the cake to save time and reduce stress.
Table of Contents [show]
Know the Necessary Size
Before you start baking, you should know how big a wedding cake you need to feed all guests. A standard wedding cake serving size is about four inches tall, one inch wide, and two inches deep.
Based on this slice size, a six-inch round cake serves 12 guests, an eight-inch round cake serves 24 guests, and a 12-inch cake serves 56 guests.
Fifteen inches is the largest you can go with a single tier, which would serve 89 people.
A six-inch square cake serves 18 people, eight-inch – 32 people, and 12-inch – 72 people. A six-inch heart-shaped cake will only feed eight people, and to feed 25 people, you would need to make a 12-inch cake.
With an average wedding guest number exceeding 160, most couples opt for tiered wedding cakes. Estimating the number of servings in a tiered wedding cake is simple – add up the number of servings in each tier.
Note that the necessary wedding cake size also depends on other desserts you serve or the lack of such. Estimate twice smaller servings if you also plan to serve cupcakes, cookies, ice cream, or the groom’s cake.
Furthermore, most couples get away with serving enough cake to feed about 80% of the guests because some will inevitably decline the cake due to dietary restrictions.
You should also consider whether you want to save the top tier of your wedding cake for your first anniversary.
Estimate the Costs
Wedding planning involves a lot of budgeting, and baking a DIY wedding cake isn’t an exception. Since you’re planning to bake the cake yourself, estimating the costs is straightforward because you don’t need to consider the labor fees.
After determining the wedding cake size, count the necessary amount of every ingredient.
You may buy some ingredients in bulk if you’re planning to make a large cake. Don’t forget to count the frosting, decorations, and add-ons like the cake stand.
A common misconception is that a DIY wedding cake is always cheaper than a professional one. This isn’t true – pro bakers have access to cheaper ingredients and already have all the required supplies.
Meanwhile, you will likely need to purchase coloring gels, cooling racks, decorating bags and tips, and other equipment that doesn’t come cheap.
Sometimes, the cost of a DIY wedding cake exceeds the price of a similar professional cake multiple times.
Of course, the cost largely depends on the flavor. Vanilla buttercream and chocolate cakes are the cheapest because they don’t contain seasonal ingredients. On the other hand, a lemon-raspberry cake in winter or a pistachio cake may be pricey.
Gather Your Tools
For a professional wedding cake, you’ll need a professional toolset. The necessary supplies may vary depending on your desired cake type and design.
The essential tools required for any cake include baking pans, a rolling pin, cake leveler, spatula, knife, cake board, a whisk or mixer, spoons, baking paper, and multiple bowls of different sizes.
A turntable is optional, but it can be of great help in decorating the cake. Additionally, you may need fondant icing if you want a fondant cake, piping bags with tips, rose cutters, sprinkles, faux flowers, cake toppers, luster dust, and a small brush.
The variety of baking tools available in stores nowadays is genuinely astonishing. However, don’t attempt to use new decorating techniques or tools for the first time when baking a wedding cake.
Pick a Recipe You Know
Picking a recipe that you know is key to a successful DIY wedding cake that tastes and looks like a professional dessert. Unusual flavors and sophisticated recipes may be tempting.
Lemon-meringue, tropical coconut mousse, black forest, lemon-basil with strawberry compote – the flavors sound mouthwatering, but you should adequately evaluate your skills.
If you’ve already mastered baking triple chocolate cake, go for it. Choose a recipe you’re experienced in baking to guarantee that everything goes smoothly.
Practice Is Key
Another vital point in ensuring your DIY project success is practice. Even if you choose a recipe you know, test it out multiple times to ensure you’ve mastered each step of the process.
You likely know how many factors affect the cake’s look and taste. Incorrect temperature, time, insufficient mixing, or a different brand of ingredients can ruin even a recipe you’ve made a hundred times.
Practice making every seemingly minor detail of the cake to guarantee it will be flawless. Test the frosting recipe, the filling, and sponges. Your technique should be immaculate.
The Schedule
The wedding planning timeline tends to be tightly packed. Time management is essential for baking a DIY wedding cake. The preparations should start about two months in advance – it’s the perfect time to test the recipe and practice.
Two months before the wedding is also the right time to place fresh flower order. About a month before the big day, confirm the guest count, double-check the ingredient totals, make a grocery list, and purchase non-edible tools.
You should also confirm the cake’s storing place with the venue. If the venue doesn’t have a fridge to store the cake, you will need to find another place to store it before the reception. Consider also the delivery options.
A week before the wedding is when the real work begins. Purchase edible ingredients apart from those with a short shelf life. Bake cake sponges and wrap them tightly in multiple layers of plastic wrap, then freeze them.
Baking the sponges about a week in advance will save you plenty of time the day before the wedding and reduce stress.
The day before the wedding, make the cake filling, assemble the tiers, and decorate the cake. Add fresh flowers or fruits an hour before the reception.
Plan the Design Ahead
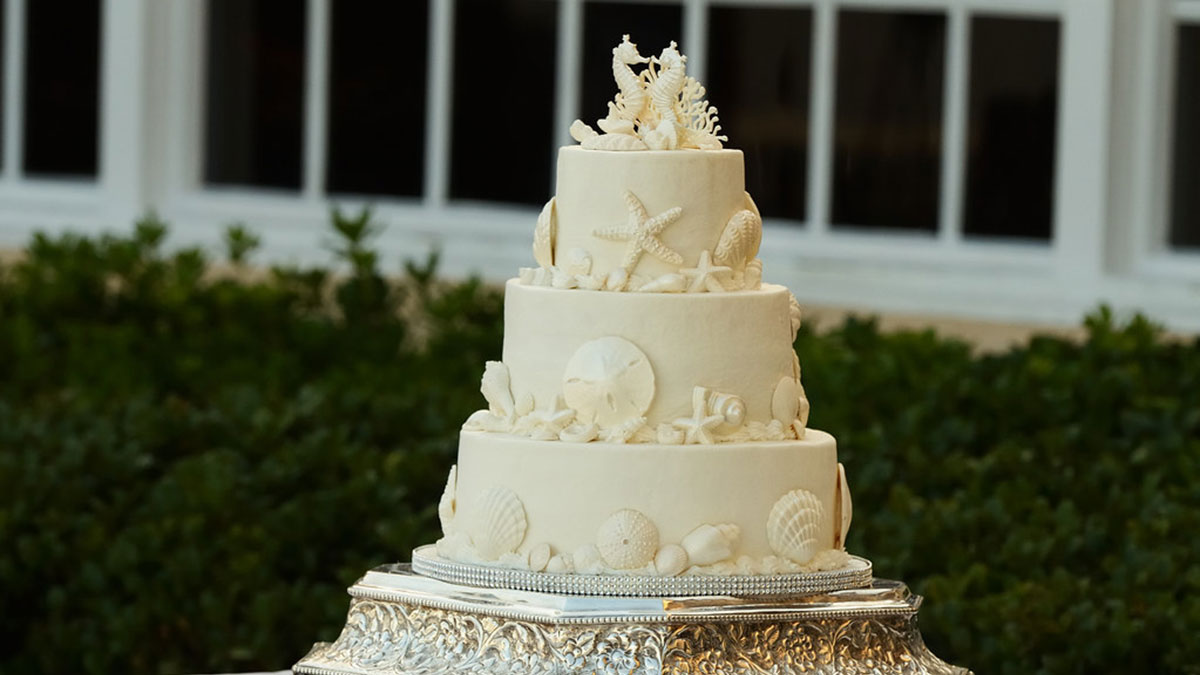
Design is a significant factor in any wedding cake. The wedding cake will be in the spotlight and remain in the wedding pictures forever. The design doesn’t have to be elaborate, but the cake should at least look neat.
Plan your cake’s design ahead to estimate the costs and ensure all supplies are available. For example, if you want to decorate the cake with fresh flowers, check whether the desired variety is in stock for your wedding month.
Be careful when fantasizing about the design and evaluate your skills. Some designs look significantly easier to make than they actually are. For example, you need a lot of experience to create a perfectly smooth fondant coating.
The easiest DIY wedding cake design idea is a classic textured buttercream coating decorated with sugar flowers, fruits, or ready-made toppers.
However, if you have advanced baking skills, consider unusual cake decorating techniques such as faux velvet coating, glossy mirror-like coating, airbrush, or marble effect.
Baking & Constructing the Cake
The necessary baking temperature and time depend on your chosen recipe. However, some wedding cake baking tips are universal.
Firstly, always follow the recipe and measure your ingredients precisely. Secondly, the base ingredients like butter, milk, and eggs must be at room temperature.
Thirdly, use cake flour rather than all-purpose flour because it’s finer and gives sponges a delicate consistency.
However, there are exceptions – cakes that contain cocoa or wet ingredients such as fruits require all-purpose flour.
Don’t under-mix or over-mix the ingredients. Use high-quality cake pans and cover them evenly with parchment paper to ensure the sponges are neat. Never open the oven while the sponges are baking.
Test the sponges for readiness with a toothpick and allow them to cool completely in a pan. If you’re in a rush (which you shouldn’t be if you bake the sponges a week in advance), place them in a fridge for 30 minutes.
If you’ve never made wedding cakes before, you may wonder how to assemble tiered cakes and ensure the tiers don’t slide or tip. One method is to use individual cake boards.
With individual cake boards, you can transport the tiers separately and assemble them right before the reception.
Before assembling levels, lightly place a cake board without a cake on top of the bottom tier to make an outline and ensure it’s precisely in the center.
Decorating & Storing the Cake
If you plan to use fresh flowers on a wedding cake, consider safety first. Avoid any flowers that are toxic when consumed, and wrap the stems of flowers with floral tape to ensure they don’t get in contact with the frosting.
Not all fruits are equally suitable for wedding cake decoration. Avoid apples, bananas, and other fruit that will oxidize and ruin the look.
You should also know how to store a cake before the wedding. Ideally, store it in a refrigerator disassembled, in air-tight containers, ensuring no smelly foods are close.
You can place the cake in the freezer for about 15 minutes before transporting it.


No Comments Add one
Leave a Comment