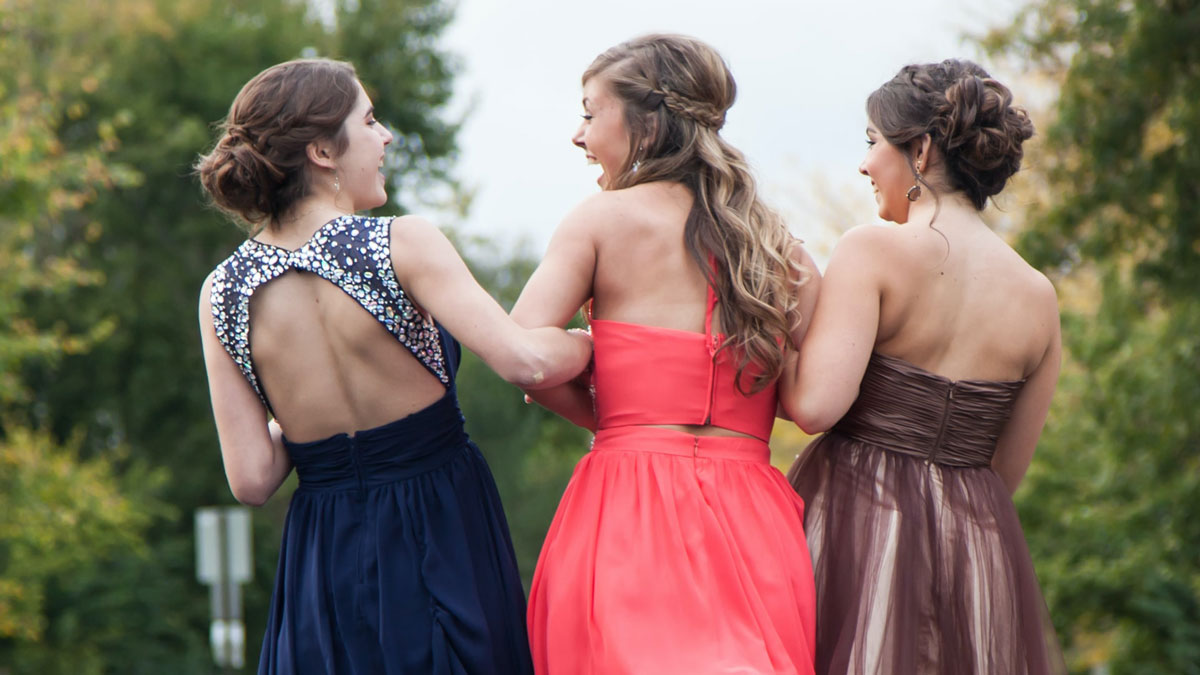
Regardless of your hairstyling skill level, there are plenty of easy hairstyles for a wedding guest to do yourself.
Professional hair styling can be costly, but you don’t need an intricate twisted updo to look stunning.
The good news is that you aren’t the bride, so if you mess up your hairstyle, no one will bat an eye. Jokes aside, evaluate your skills and timeline critically when picking the hairstyle.
Getting ready for a wedding can be stressful, even if you’re a guest. You want to choose a hairstyle you’ll undoubtedly pull off, so if you’ve never attempted Hollywood waves before, leave the experiments for another day.
Your hairstyle should complete your look but not draw attention from your face and clothes. Comfort is another factor you may want to consider.
Table of Contents [show]
High Ponytail
Ponytails are underestimated as a formal hairstyle. Although it’s so easy to make and comfortable, a ponytail can be equally well suitable for a wedding as for a gym.
Depending on your wedding guest attire, you may either opt for a sleek or messy ponytail. For a sleek ponytail, use a smoothing conditioner and apply an anti-frizz serum after washing your hair.
If you have naturally wavy locks, straighten your hair, and make a neat high ponytail. Use hair gel to get rid of flyaway hairs. You can cover the elastic with a strand of your hair for a cleaner look or tie a satin bow around it.
As for the messy ponytail, the key is to achieve volume. Don’t use an anti-frizz serum after shampooing because it may affect how your hair holds curls.
Curl your hair if it’s naturally straight, or simply apply a leave-in spray of your choice for extra smoothness and shine if you have wavy hair.
Tease the hair at the roots to add crown volume and make a very high ponytail, leaving a few strands hanging at the face. Then, place a crab clip inside the middle of your ponytail to make it appear more perky and thick.
Waterfall Braid
Braids are always a good idea, adding a romantic touch to your look. A waterfall braid is an excellent option for a wedding guest who prefers to keep the hair down but doesn’t want it to get into the face.
Braiding may seem intimidating, but a DIY waterfall braid is very straightforward. Start by taking two small strands of hair from one side of the parting and cross the one closer to your face over the second one.
Take another strand from the top of your head, next to the second one. Cross it over the first strand so that it’s in between the two, and drop it. Continue to hold the first two sections.
Repeat the steps until you’re satisfied with the braid length – typically, it only goes from one side and reaches the back of the head.
When you reach the end, extend the braid with a regular three-strand braid and secure it with a small elastic or clip.
Messy Bun
The messy bun is a simple hairstyle for a wedding guest seeking a laid-back, dreamy look. It will suit a bohemian or whimsical style and looks gorgeous with a large bow around the elastic, crystal headband, or flower clip.
Making a DIY messy bun is two steps more complex than a ponytail, so even women with zero experience can create a nice bun from the first try. First, tease your hair at roots or dry it upside down to achieve more volume.
Make a high ponytail where you want your bun to sit. Hold the elastic with one hand, twist the ponytail into a bun, and secure it using bobby pins. You may leave a few strands of hair hanging loose for a natural look.
Natural Blowout
Natural blowout is a universal DIY hairstyle for long hair that’s always appropriate and suits any attire. However, you’ll need more practice to make a nice blowout at home than you would with a ponytail.
Start by applying a smoothing mask after shampooing because the hair should look healthy and bounce as you move. Wait until your hair is semi-dry, apply anti-frizz serum if needed, and then spray with a heat protector.
Take a round brush and a dryer with a concentrator nozzle. The smaller the brush diameter, the tighter your curls will be.
Start drying your hair in strands, pointing the concentrator nozzle downward to close the hair cuticle and constantly rotating the brush.
You may use a volume spray before drying or talc powder at the roots when the hairstyle is ready. Spray with a lightweight leave-in conditioner to smooth the hair, but don’t apply any heavy products to avoid weighing it down.
Beach Waves
Beach waves are a relaxed and romantic hairstyle for a wedding guest. Depending on your hair type, you may use special products for a beach hair effect without thermal treatment or opt for a help of a curling wand or flat iron.
Products for the beach hair effect typically contain salt and are meant to mimic the effect of saltwater on your hair, adding volume and texture. However, this method may not be effective on naturally straight, non-porous hair.
If you decide to use a curling wand or flat iron, use a strong heat protection spray beforehand and dry your hair as usual. Curl your hair in about half-inch strands, constantly changing the direction for a messy effect.
Alternatively, you may apply a salt spray before you go to bed and make braids or a messy bun. You may need to apply a strong hold spray to keep the curl for longer because this method isn’t as effective as the thermal method.
Hollywood Waves
The opposite of messy, relaxed beach waves, Hollywood waves are the ultimate red carpet hairstyle favored by celebrities since the 1920s. DIY Hollywood waves require intermediate hairstyling skills.
The most time-efficient way to make Hollywood waves is by using a flat iron or curling wand, although you may attempt the classic pin curl method if you have porous hair that doesn’t require frequent washing.
Before you start styling, get rid of frizz and ensure your hair is shiny and silky. When it’s dry, apply heat protection spray and make a clean side parting.
Curl your hair in about half-inch strands, and carefully brush every strand afterward using a wide-set comb. The key to Hollywood waves is curling every strand in the same direction. Use a strong hold spray as a finishing touch.
Note that Hollywood waves aren’t the most long-lasting hairstyle, and they tend to lose shape in humid weather. It isn’t a good hairstyle choice if you plan to take the bus to your party.
Sleek Chignon
Chignon is a sleeker, elegant version of a messy bun, so making it is really simple. Most importantly, your hair should be straight and shiny.
Start by carefully combing your hair and applying anti-frizz serum. Then, create a clean parting in the middle or on the side and make a low ponytail. Spritz some hair spray onto the strands for a sleeker look.
Take the ponytail and twist it, forming a loop. The hair ends should be pointing towards the crown, but make sure you have about two inches hanging loose. Next, hide the loose end under the elastic and secure the hairstyle with bobby pins.
Finally, use a strong hold spray to get rid of flyaway hairs and maintain a sleek look throughout the day. A chignon looks especially chic with a pearl hair clip, headband, or satin bow.
Half-Up, Half-Down
Half-up, half-down hairstyles are the ultimate solution for anyone who can’t decide between leaving the hair down or making an updo. They facilitate natural hair movement and give your look a romantic touch while keeping the strands from getting in your face.
The easiest DIY half-up, half-down hairstyle is a regular small ponytail at the crown of the hair, but you may also make a braid or bun, depending on your hairstyling skills.
If you’ve already mastered the waterfall braid, you can make one from each side and tie them together at the back with an elastic.
Half-up, half-down hairstyles work equally well on straight, wavy, and curly hair, mid-length or long, and look gorgeous with statement hair accessories like pearl clips, bows, and flower crowns.
Wear a Headband
Even if your hairstyling skills equal zero or the time is tight, you can create a stylish DIY wedding guest hairstyle by using a statement headband.
Consider pearl, velvet, satin, flower, or printed wide headbands. Alternatively, you may wrap a silk scarf around the head.
Simply wear the headband and leave your hair loose – it will look chic both on straight and wavy hair.
Fishtail Braid with a Ribbon
A DIY fishtail braid is easier than it seems, but you may need assistance or a second mirror to see how your braid looks from the back.
Start by dividing your hair into two sections and take about a quarter-inch strand from the front of the left section. Pull it across the left section and tuck it under the right one. Tug both sections to tighten them.
Repeat these simple steps with other strands until you reach the desired braid length, then tie it with an elastic. Tie a satin or lace ribbon around the elastic in a bow and leave the ends cascading for a dreamy look.


No Comments Add one
Leave a Comment